Adobe Photoshop is a powerful and versatile tool used by photographers, graphic designers, artists, and creative professionals worldwide. If you're new to Photoshop, setting up your first project may seem daunting, but fear not! In this comprehensive guide, we'll walk you through the essential steps to create and set up your first project in Photoshop, whether it's for photo editing, digital art, or graphic design.
Step 1: Launch Photoshop
Before you can start working on your project, you need to open Photoshop. Locate the Photoshop icon on your computer and double-click it to launch the application. Once Photoshop is up and running, you'll be greeted by the welcome screen.
Step 2: Create a New Document
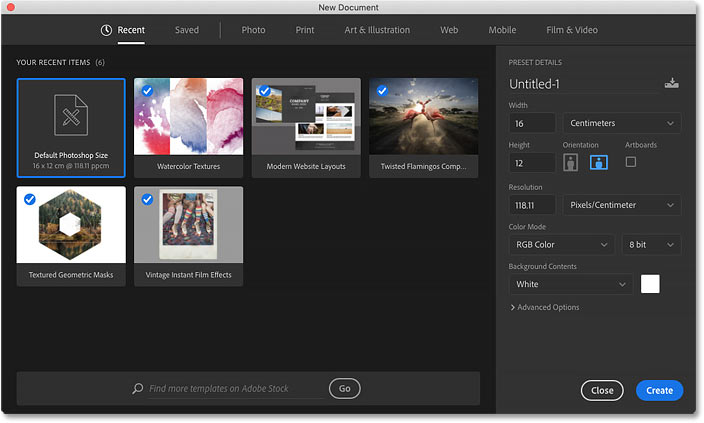
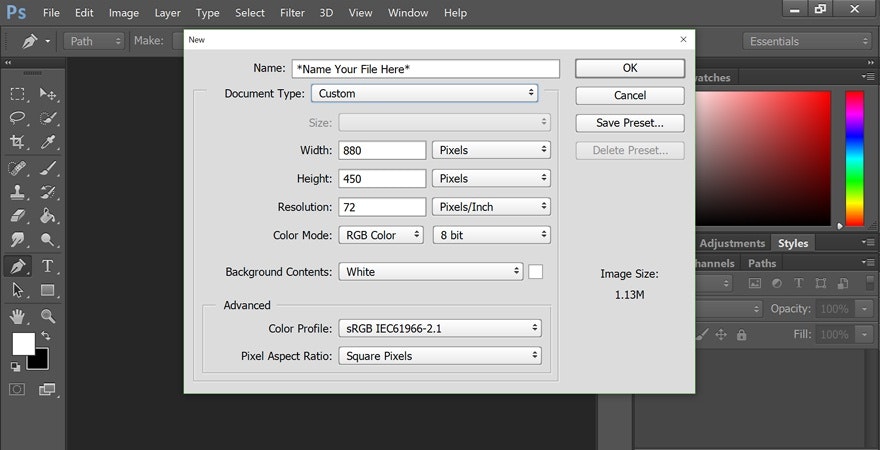
To create a new project, click on "Create New" on the welcome screen or go to "File" > "New" from the menu bar. This will open the New Document dialog box, where you can specify various settings for your project.
Document Name and Presets:
Start by giving your project a name in the "Name" field. This helps you keep your work organized.
Photoshop offers various presets for common project types, such as print, web, and mobile. Choose the one that matches your project's intended use.
Document Size:
Specify the dimensions of your canvas in the "Width" and "Height" fields. You can choose from presets or enter custom values.
The "Resolution" determines the quality of your project. For print, use 300 pixels per inch (PPI); for web, 72 PPI is standard.
Color Mode:
Choose the color mode that suits your project. RGB is for digital screens, while CMYK is for print. Grayscale is suitable for black and white projects.
Background Contents:
Decide on the initial content of your background layer. You can choose between a white, transparent, or background color fill.
Step 3: Artboards (Optional)
If you're working on a multi-page or multi-artwork project, you can use artboards. In the New Document dialog box, select the "Artboard" option and specify the number of artboards you need. Artboards help you keep different elements of your project organized.
Step 4: Advanced Settings (Optional)
Click on "Advanced Options" in the New Document dialog box to access more settings:
You can adjust the color profile, bit depth, and pixel aspect ratio if your project requires specific configurations.
"Units" lets you choose your preferred unit of measurement for the rulers.
Step 5: Creating Your Document
Once you've configured all the settings to your liking, click the "Create" button. Photoshop will generate your new project with the specified dimensions, resolution, and background.
Step 6: Exploring the Workspace
Now that your project is set up, take a moment to familiarize yourself with Photoshop's workspace. You'll find tools, panels, and menus that are essential for creating and editing your project. Don't worry; it may seem overwhelming at first, but with practice, you'll become more comfortable navigating the interface.
Step 7: Save Your Project
Before you start working on your project, it's crucial to save it. Go to "File" > "Save As" and choose a location on your computer to save your work. Select a file format (PSD is recommended for saving editable projects), and give your file a name.
Step 8:
Begin Your Creative Journey
With your project set up and saved, you're ready to dive into the world of Photoshop. Start by experimenting with the various tools and features, exploring layers, and bringing your creative vision to life.
Conclusion
Setting up your first project in Photoshop is an essential step in your creative journey. By following this comprehensive guide, you've learned how to create a new document, configure essential settings, and navigate the Photoshop workspace. Remember that practice makes perfect, and as you continue to work with Photoshop, you'll become more proficient and confident in your design and editing skills. So, go ahead, unleash your creativity, and let Photoshop be your canvas for artistic expression and design excellence.


0 Comments